
Submitted by lexa on
As a routine while color profiling one needs to sample many color patches. This can be achieved by setting Selections manually and subsequently transforming Selections into Samples, but in RawDigger we offer a more productive and convenient method of processing the color targets.
The Selection Grid is enabled only in the RawDigger Profile Edition.
Grid-type selection is activated via menu: Selection->Selection Grid. You will be presented with the Grid Parameters dialog that allows controlling the grid parameters.
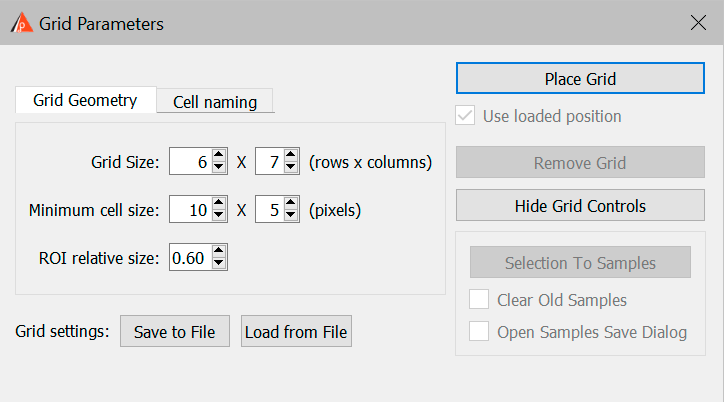
Dialog parameters:
- Grid Size: number of the cells that form the grid
- Minimum cell size: the minimal number of pixels that compose the cell of the grid; while interactively changing the size of the grid this number limits the cell shrinking.
- ROI relative size: the averaging of the values under the cell shall take part from the central portion of the cell, as defined by the region of interest, ROI, marked in red. ROI: the ratio of the cell side size (sell being displayed as the red rectangle) to the size of the side of sampling rectangle (this rectangle is displayed as gray).
- Grid settings button group (see below how to save and load grid settings):
- Save to file – saves the current settings to a file.
- Load from file – loads the grid settings from a file
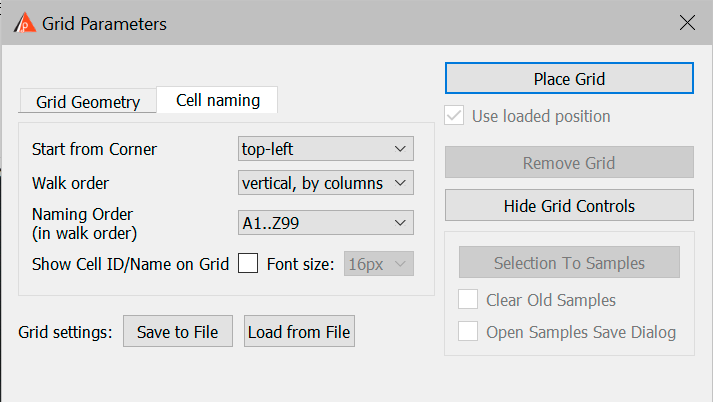
- In the Cell Naming tab, there are located settings to control grid cell naming:

- Start from corner: to select the corner at which the first cell is placed
- Walk order: the order in which the cells are numbered, column first or row first
- Naming order: one of the 7 methods of cell naming
- Show Cell ID/Name on Grid: to display (or not) the cell names
- Place Grid: to place the grid on the screen
- Use loaded position – uses the grid’s position if it was loaded from a file (this checkmark will only be available if the grid’s position was successfully loaded).
- Remove Grid: to remove the grid from the screen
- Selection to Samples: fills the Samples (deleting the old content if the checkbox to Clear Old Samples is set)
- Hide Grid Controls: to hide the grid control dialog.
After the Place Grid button is pressed the main program window displays the grid. All the grid parameters except the Grid Size (grayed out) can be altered using the Grid Parameters dialog.
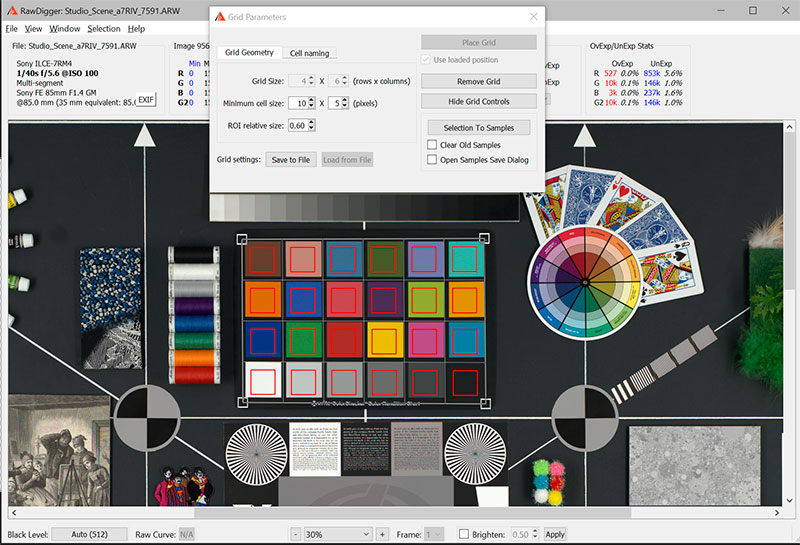
You can move the grid on the screen:
- Moving the corners:
- While the left mouse button is pressed you can move one corner.
- While Ctrl is pressed simultaneously with the left mouse button you can change the dimensions of the grid
- To drag the whole grid set the mouse pointer to the center of the grid, press and hold the left mouse button and do a drag.
After the Selection to Samples button in Grid Parameters dialog is pressed the sample table is filled with the readings named in accordance with the cells naming scheme.
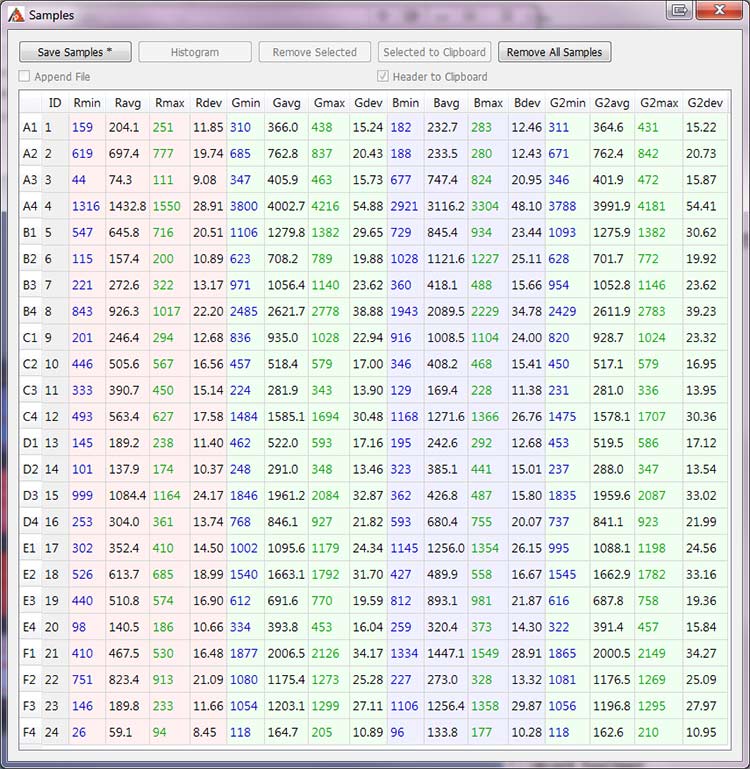
You can process and save these readings in the usual manner (save as CSV or CGATS, delete table rows, display histograms of selected samples, etc.).
The last set of Selection Grid parameters are automatically saved and reused when the program is restarted.
Saving/Loading grid settings
Grid Settings – Save to File button:
- This will save the grid settings to a file with an RGS extension, exactly as they are currently set in the grid settings dialog (Grid Size, Minimum cell size…).
- If the grid is placed over an image, then the coordinates of its corners will be saved.
Grid Settings – Load from File button:
- This is active only if there is no grid on the screen (if there is one, use the Remove Grid button)
- This will read all of the settings for the grid setting dialog from an RGS file, and apply them.
- If the coordinates of a grid were recorded to the RGS file, then this will read them and the checkbox Use loaded position under the Place Grid button will become active.
Place Grid button with the Use loaded position checkbox set:
- If the pixel dimensions of the currently opened image file exactly correspond to the dimensions of the grid settings that were saved to the RGS file, then the grid will be placed exactly as recorded, “to the pixel.”
If the pixel dimensions of the current file differs from the one for which the grid was saved, then the grid will be set based on relative coordinates.
When restoring the grid from the saved coordinates, the visible part of the screen scrolls so that the grid is visible (this is relevant when working with large zooms).
Add new comment