
Submitted by LibRaw on
What's new:
In the time since RawDigger 1.2 was released, a certain number of requests from our users has piled up, which we have now fulfilled.
This has caused changes in the menu, Preferences, and user interface; thus, the increase in the sub-version number from 1.2 to 1.3.
Improvements
- Sample coordinates can now be saved and restored
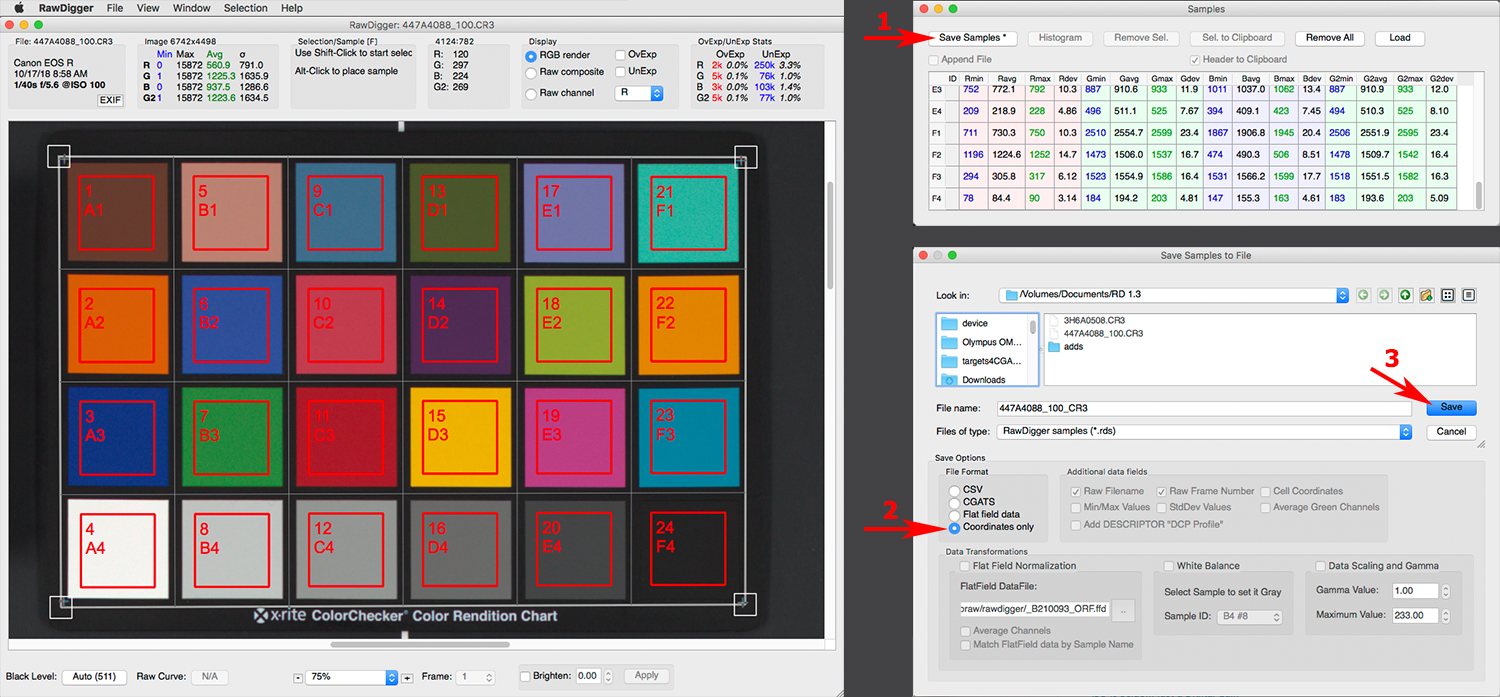
- to save sample coordinates, press the 'Save samples' button in the Samples dialog (number 1 on the picture below), then choose the 'Coordinates only' option (number 2 on the picture below) and press the 'Save' button (number 3 on the picture below) in the Save dialog. By default, the file will have an .rds extension.
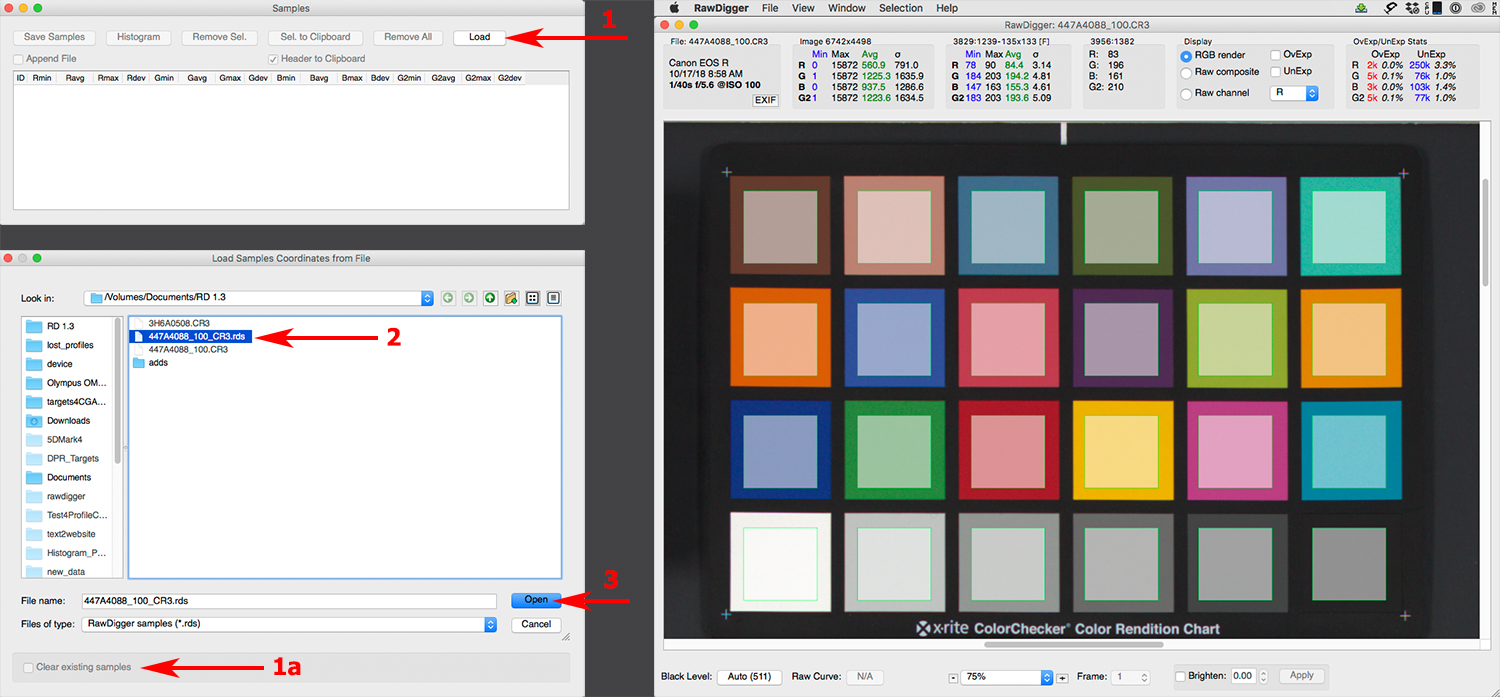
- to load samples, press 'Load' in the Samples dialog (number 1 on the picture below); the next dialog presents the option to clear the existing samples before loading (number 1a on the picture below) if they exist and hadn't been removed earlier.
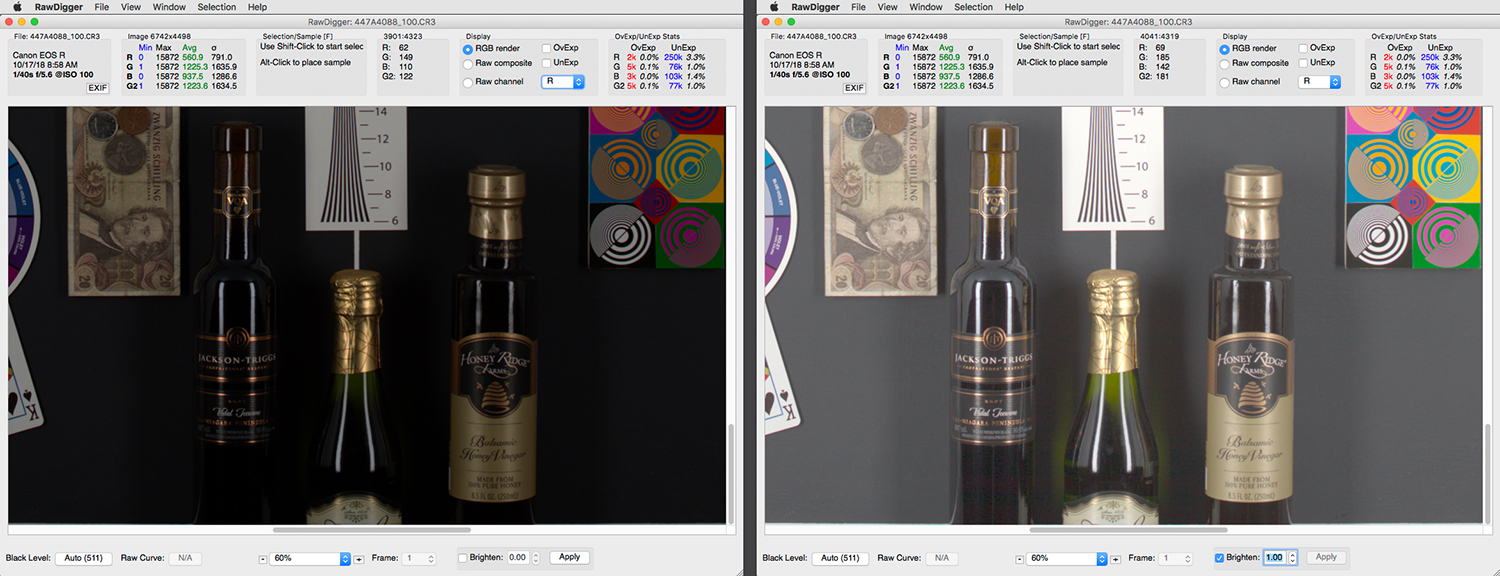
- Brighten section at the bottom bar of the main screen (as shown on the picture below - checkbox (1), entry field (2), Apply button (3)) - available for RGB render mode only.
- When the checkbox is enabled, it gives one access to the entry field that controls the increase in brightness entry field and the Apply button, to apply the changes.
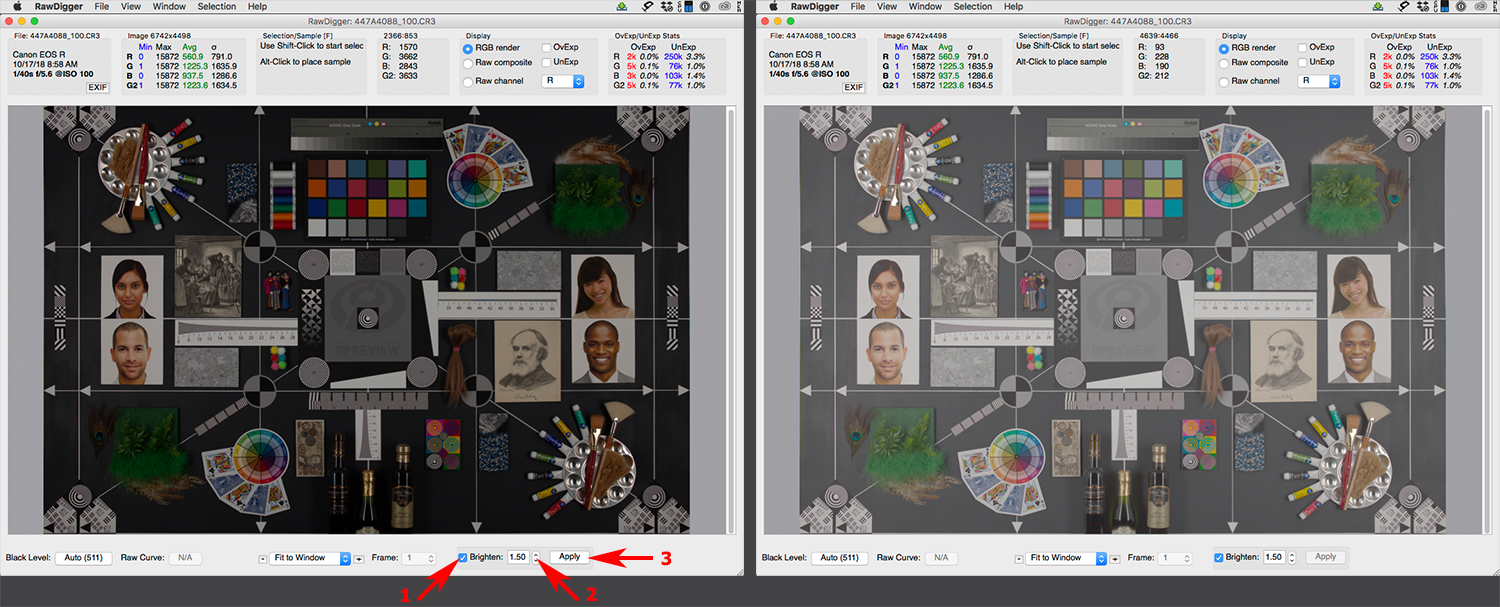
- The brightness is increased via a gamma change, highlights are not clipped.
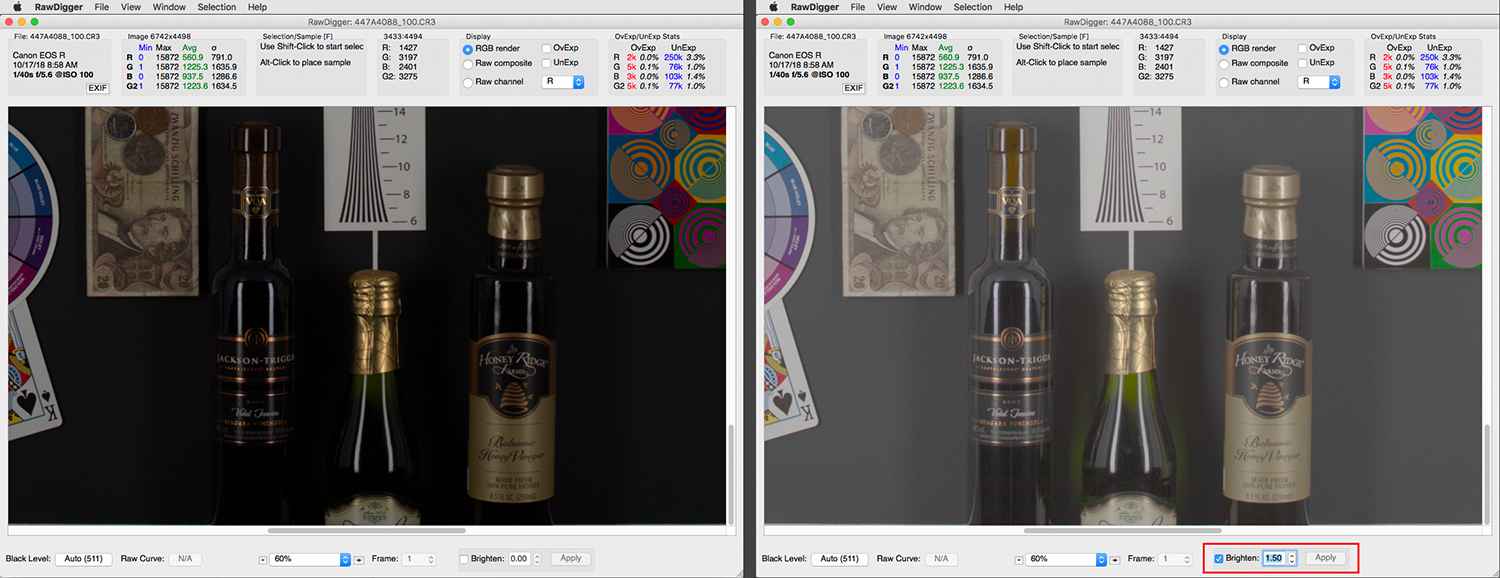
Brighten can be used for casual shadow inspection
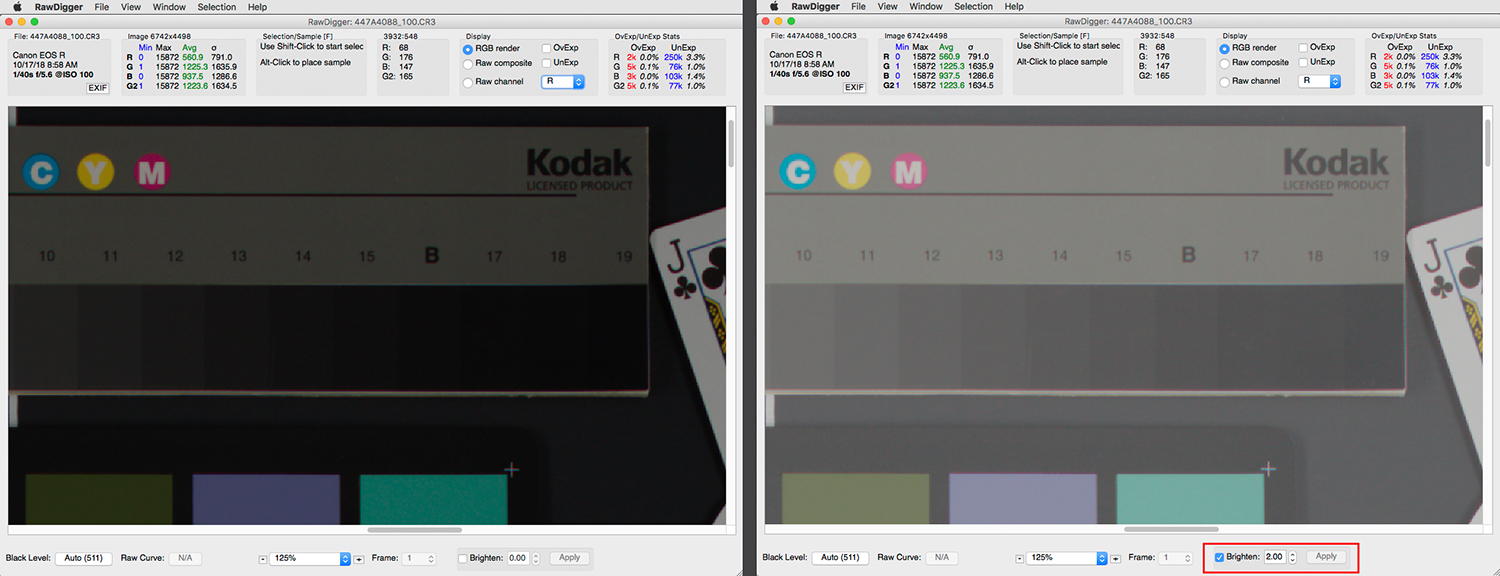
Brighten can be used to simplify sample placement, making borders more visible
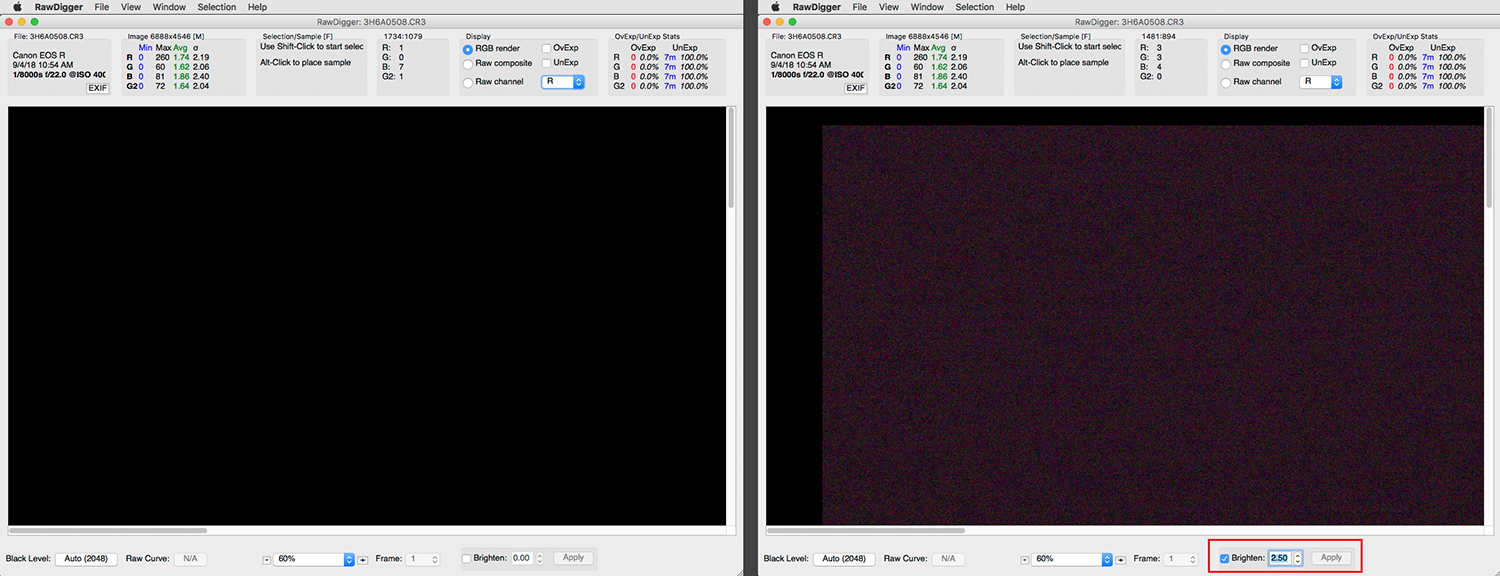
Brighten can be used for deep sensor research
- Preferences - Display Options - Allow autoexposure to clip % (highlights)
- This new setting controls the relative amount of pixels that can be clipped when autoexposure is applied, and thus it controls the amount of lightening applied through autoexposure.
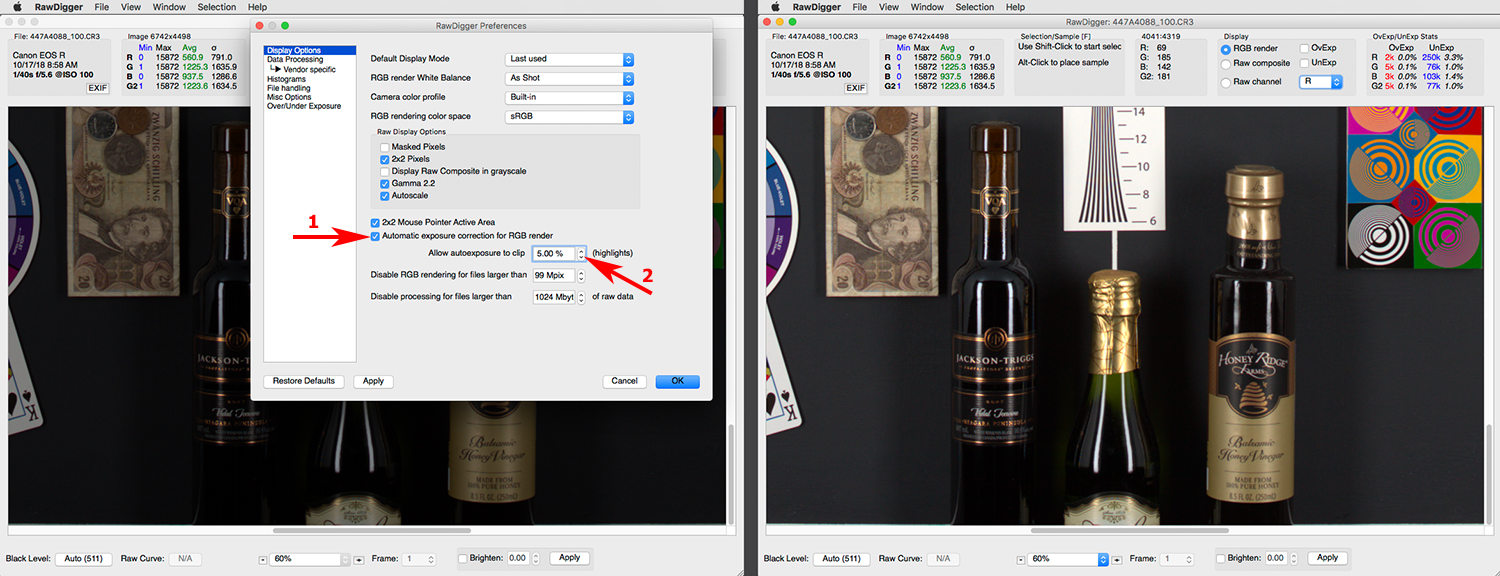
Automatic Exposure Correction
- After this, Brighten can still be applied
Original vs both Automatic Exposure Correction and Brighten applied
- Preferences - Display Options - RGB rendering color space,
- For this new setting, the choices are: sRGB (default), Adobe RGB, Wide Gamut RGB, ProPhoto RGB.
- RawDigger doesn't use color management, the output to the screen is direct; the user of a monitor that is set to emulate Adobe RGB or, more generally, wide gamut monitors may benefit from selecting Adobe RGB here; other options may become useful if you want to display less saturated colors.
- Preferences: Display - Override white level,
- Allows to set white level used for rendering to user-specified value.
- Preferences - Misc Options - Minimize subwindows together with main window
- If this new setting is enabled, minimizing the main program window will also cause minimization of Histogram, Samples, and EXIF windows.
- Restoring the main window will also cause those child windows to be restored too.
- (Windows and Mac OS X/macOS 10.9+) An option to switch to full screen mode has been added, Menu - View - Fullscreen or F11
- Buttons to minimize / maximize the Histogram and Samples windows are added.
- Re-factored and improved processing of DNG files that contain multiple images
Settings in Preferences - Data Processing - Vendor specific - DNG section:- Show Enhanced image frame: to allow the display of the image that corresponds to Adobe Camera RAW/Lightroom: Enhance image
- Show Preview frames: to allow the display of previews (usually those previews have low resolution) and Fast load data
Defaults are: Show Enhanced image: off; Show Preview: off To view and analyse those additional images use the "Frame:" selector (bottom line of the application window)
Camera support added
- Canon PowerShot G7X Mark III, PowerShot G5X Mark II, EOS M6 Mark II, EOS 90D
- Fujifilm GFX100, X-A7
- Olympus TG-6
- Sony RX0-II, A7R-IV, RX100-VII, ILCE-6100, ILCE-6600
- Preliminary support: GoPro HERO5, HERO6, HERO7, Fusion
Other Changes
- Removed 16383pix image size limit
- Disable RGB rendering for files larger... upper limit is raised to 511Mpix in 64-bit version.
- Fixed inconsistency in Use Linear Curve option:
- it is decoupled from 'Use RawSpeed Library' option
- if 'Use Linear Curve' is enabled, RawSpeed isn't used
- if 'Use RawSpeed Library' is enabled, the option to change the curve (in the bottom line of the main screen) is blocked.
- Some of the settings have been moved from 'Misc Options' to 'File Handling' section of Preferences.
- Display Options - Disable processing for files larger than NN Mbytes of raw data: upper limit is raised to 8191 Mbytes on 64-bit systems.
- Exiftool updated to version 11.65
Download Links
User manual
- English: Rawdigger-Manual-EN.pdf
Windows (XP - 10)
- 64 bit: RawDigger-1.3.1.638-x64-Setup.exe
- 32 bit: RawDigger-1.3.1.638-Setup.exe
Mac OS X
- Mac OS X/macOS 10.9-10.15, 32/64bit: RawDigger-1.3.1.638.dmg
- Legacy (64 bit: Mac OS X 10.5-10.9/ 32 bit: Mac OS X 10.8-10.9): RawDigger-1.3.1.638-Legacy.dmg
Add new comment